Hello and welcome to the fun new blog hop with My Creative Time. Emma has this wonderful idea to have three members of her design team create a project and share with you a technique that we used while creating our project and share it with you.
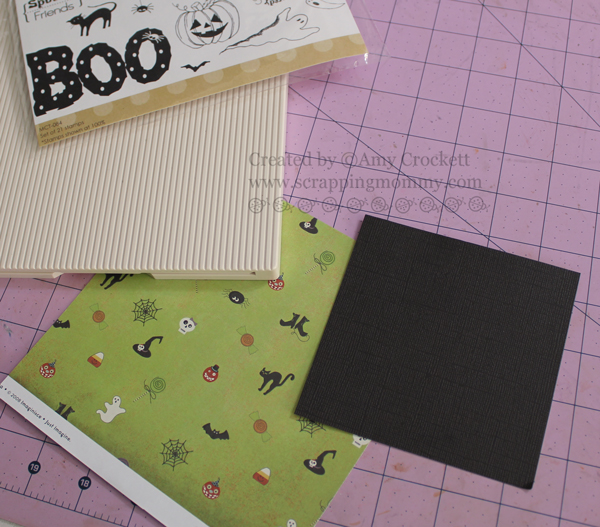
For my technique, I thought I would share with you a fun way to add texture to cardstock with any scoring tool. I have the Martha Stewart score board, so that is what I used along with a square piece of black cardstock with a purple color core (it is out of the Black Magic stack from Core'dinations).
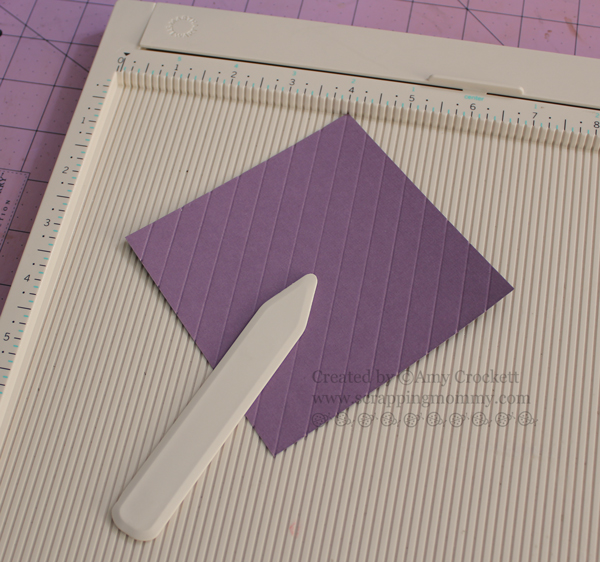
I turned over the purple core cardstock, turned it so that it was on an angle to my board and scored it at every 3/8 of an inch.
I turned the cardstock piece 90 degrees and scored it again in the opposite direction at every 3/8 of an inch. (Please excuse my poor ink stained cutting mat)
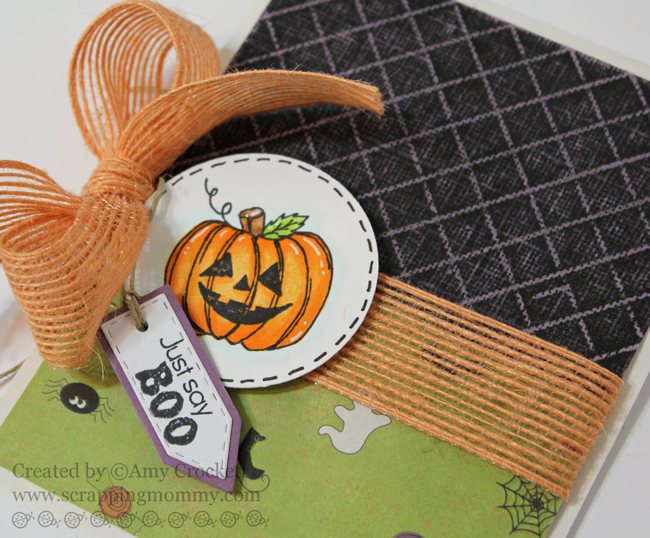
I then turned it over and sanded the black front with a sanding block so that the purple shows through at the score marks.
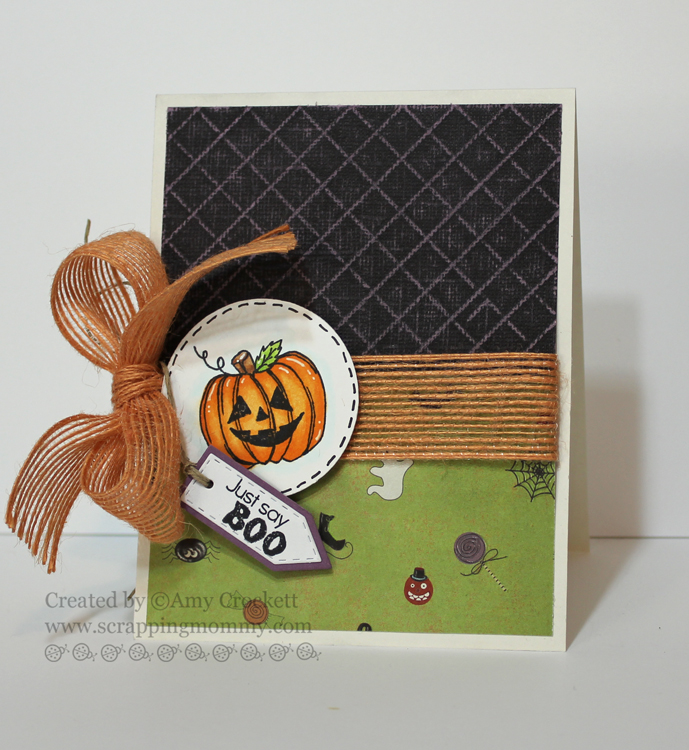
I then attached it to my card with the super fun images from the new Treats for my Sweet stamp set from My Creative Time. The tag is die cut from the Teeny Tag Greetings set. I colored in the pumpkin with Copic markers and added some beautiful orange Jute Ribbon from Liz's Paper Loft Boutique. The patterned paper is from Imaginisce and I cut the circle with my Cricut Expression 2 and the preloaded Cricut Essentials cartridge.
I am adding this to the Focal Point Challenge in the Moxie Fab World.
I am so excited to share the links for the two other super talented designers participating today.....I can't wait to see what they created to share with you, too.
Amy ~http://www.scrappingmommy.com/ (You are here)
Cassandra ~ http://www.ctimz3.blogspot.com/
Cathryn ~ http://inthepinkcathryn.blogspot.com/
Have fun!!
Hugs,
Amy



OMG!!!! You are ONE AMAZING & TALENTED lady my friend!!! I just LOVE this technique & I will DEFINITELY have to pick up that coordinations paper TODAY!!! lol... THANK YOU!!!
ReplyDeleteBig HUGE hugs,
Emma;)
WOW!!! What a neat idea I do have MS scoring board so I am definitely going to do this and I love it because you don't have to have a college degree to do it....WOW I have tons of co'ordinations paper too so guess I'm all set! Thanks a million!!!
ReplyDeleteO wow that is amazing!! I will have to give this a try!! thanks for sharing!
ReplyDeleteKristan
Cute card and GREAT technique! The lines look perfectly straight and square. Gotta love that MS scoreboard! LOVE that textured ribbon...the lines in it complement the scored lines and add great interest all around. TFS!
ReplyDeletewhat an awesome technique!! Thanks for sharing the step by step and the finished card is adorable!!!
ReplyDeleteLOVE it!!
I love your technique, Amy! I am going to have to try this! So cool!!!
ReplyDeleteVery cute card, love that technique, it looks like the paper came like that. Thanks for sharing something new to me. :)
ReplyDeleteWOW, I love this technique. I have some of that paper and totally want to try this now. I cannot wait to give it a try. This card is BEAUTIFUL! Hugs- Glora
ReplyDeletelove this technique, so easy! Thank you for sharing
ReplyDeleterosiemini@gmail.com
www.scraplovingminis.blogspot.com
What a clever use of the scoring board! I love how perfect the lines are.
ReplyDeleteThis is such an awesome technique. Love paper from Coordinations. Can't wait to try this. Thanks for sharing.
ReplyDeleteHow fabulous! I love it. Scoring can do so much and I NEVER remember it. Thanks for the reminder. Love the sanding, too.
ReplyDeleteBe blessed, Beckie
Great technique. TFS.
ReplyDeleteBarb from Toronto, Canada
Love the idea. Always looking for that little extra touch.
ReplyDeleteCool idea!! Thanks for the tip :)
ReplyDeleteYour card is so fun and I love all the layers. The combination of the Core'dinations cardstock and your scoring technique add such fun dimension to your card. Thanks for sharing this great technique.
ReplyDeleteSuper Cool idea!TFS
ReplyDeleteThis is a really cool idea and it makes your card pop!! Thanks for sharing!!
ReplyDeleteamy, I have that board, I only use it to score one line...well that's about to change! thanks for reminding me what my tools can do!
ReplyDeleteWhat a fun technique!!! I love learning something new...never tried this before :)
ReplyDeletethis is a cute card! this technique is a good one! love it! thanks for sharing!
ReplyDeleteAmy ~ Oh WOW! This is a really COOL idea and technique! It makes your card even more GORGEOUS! I am so going to have to try this one! I LOVE the distress look! GREAT card too with all the details!!!! Of course the papers too! I also like that sanding block ~ wow where did you get that??? AWESOME tip!
ReplyDeleteI really enjoyed your great technique,tfs.
ReplyDeleteI love this technique and how your card turned out
ReplyDeleteSuch a cute idea! Would have not thought of scoring for a textured look.
ReplyDeleteWOW Amy!! I love this technique! And I love the detail it gave your card! That is such a cute idea, I have to give this a try! Thanks so much for sharing! And love your card! :) Have a wonderful day! lindagk23
ReplyDeleteOh wow! I have to try this! Great effect.
ReplyDeleteWow that sanding made the card really pop. Love the textured look of that. Thanks for the Technique Tip. Smooches...
ReplyDeleteThank You for sharing this great tip and technique...now I need some core color stock...mine is all solid. Until then I guess distress inks might work but not the same.
ReplyDeletequilt 4 fun 2 at hot mail dot com
Wow, that is so great. I love this technique and would not have thought of it.
ReplyDeleteLeslie
Wow, that is so great. I love this technique and would not have thought of it.
ReplyDeleteLeslie
Wow I love this!!! What a great technique, Amy! this is fabulous!!
ReplyDeleteLove this technique Amy! This card is so cute but simple to make!! I love simple and cute and simple and elegant, they just catch my eye!
ReplyDeleteHi Amy!
ReplyDeleteI love your card! I only use Core'dinations paper but I am always in such a rush to get stuff done that I never take advantage of the core color. :( Oh well, some day. :) Fabulous technique girlie!
Ruthie
love the technique. Will have to remeber how nice it looks sanded. Thanks for sharing,
ReplyDeleteDawnRI
Super cool and easy to do technique for adding texture! Thank you for sharing.
ReplyDeleteGreat design technique. Using this will make my paper more interesting and add some dimension and texture. Thanks for sharing your creativity.
ReplyDeleteOgdendoll @gmail.com
Sooooooo S M A R T !!!!! Thanks for sharing.New follower..and YOU made my day!
ReplyDeleteCreative Wishes,
Claire S.
www.scrapmyway.blogspot.com
Thanks for sharing this technique with us--even a novice like myself could do this!!!
ReplyDeleteThanks for sharing this technique with us--even a novice like myself could do this!!!
ReplyDeleteAwesome technique! Love your blog Amy!!
ReplyDeletebdcampers@msn.com
Great technique Amy. TFS.
ReplyDeletedmcardmaker (at AOL)
(email follower)
this is awesome! tfs!!
ReplyDeleteGinasCreativePlace.blogspot.com
looks great...this would be perfect for ice cream cones!
ReplyDeleteLove this...and I have that scoreboard!! Thanks for the tip!
ReplyDeleteWhat a cute card! I've used this technique for faux stitching, but I'd forgotten about it. Thanks for the reminder, with a twist!
ReplyDeleteAmazing!! Thanks for posting!!
ReplyDeleteWow! I love learning new techniques and tricks because I don't think anyone can ever have too many :) What a fun, yet pretty simple technique that has a beautiful result. I've yet to try any core cardstock but this definitely makes me want to!
ReplyDeleteThanks so much for sharing!
What a great technique. Thanks for giving me another reason to use my tools and supplies.
ReplyDeleteI have always wanted a scoring board and after reading this, think I need to put it on my wish list. Very cute card. Thanks for sharing the technique.
ReplyDeleteGreat teechnique, thanks for sharing!!
ReplyDeleteWhat a great technique. Thanks for sharing!!!
ReplyDeleteVery creative!! Love this look!!
ReplyDeleteWhat a great technique. I will be sure to try it out:) Your card, was super cute!
ReplyDeletePeace, Love, & Cricut Hugs!
Monica L.
what an AWESOME technique!your card is FANTASTIC,LOVE the colors!SUPER job girl:)
ReplyDeleteThanks for sharing this great technique. :) I love the idea of learning new techniques every week. Your card is fabulous!
ReplyDeleteThanks for sharing Amy what a wonderful idea!!!
ReplyDeleteHey Amy! Thanks for linking this up to the Focal Point Challenge in the Moxie Fab World! I'm so glad you joined in on all the fun! :)
ReplyDelete